

Learn DIVA
Chicago house bass with Diva
In this tutorial we will using Diva to make a classic Chicago house influenced bass.
Made with Diva 1.4.1
This sound was common on the early house records coming out of Chicago during the 1980s and early 1990s. You can hear a quintessential version of this bass sound on Mr Fingers’ Can you Feel It or Adonis’ No Way Back.
The original bass was likely produced using one of the Juno family of analogue synths common during this time (Juno-60, Juno-106, AlphaJuno). So we will use Diva as our synth of choice with its ability to emulate the characteristics of these machines.
This is the sound we will be making in this tutorial:
The final result
The final bass in a full track
In this version we added a little EQ and compression to the bass. Plus, we applied sidechain compression using the kick drum.And here are the notes for the bassline. You can download the MIDI file if you want to follow along.
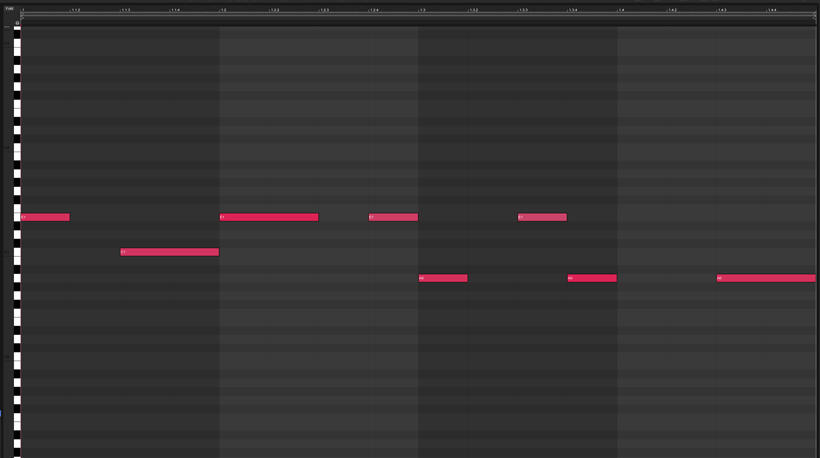
Bassline notation
Step 1
We need to configure Diva to have a similar starting point as the original Juno machines. Fortunately, Diva comes with a number of template presets to speed up the process.
Open Diva and click on Patches. Then in the preset browser click on Local to expand the category folder list. Click on Templates and then select INIT June-60.
Note: Starting in Diva v1.4.2 the Patches label is renamed to Presets.
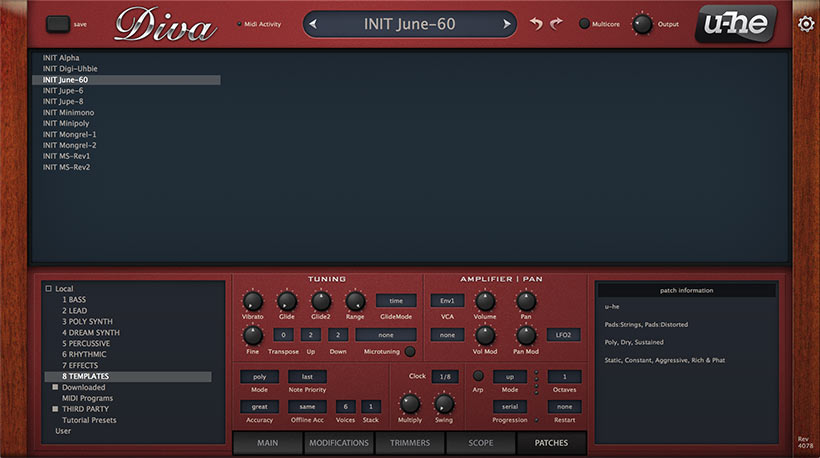
Step 1: Loading INIT June-60
Since we are making a bass, voice mode can be set to Mono.
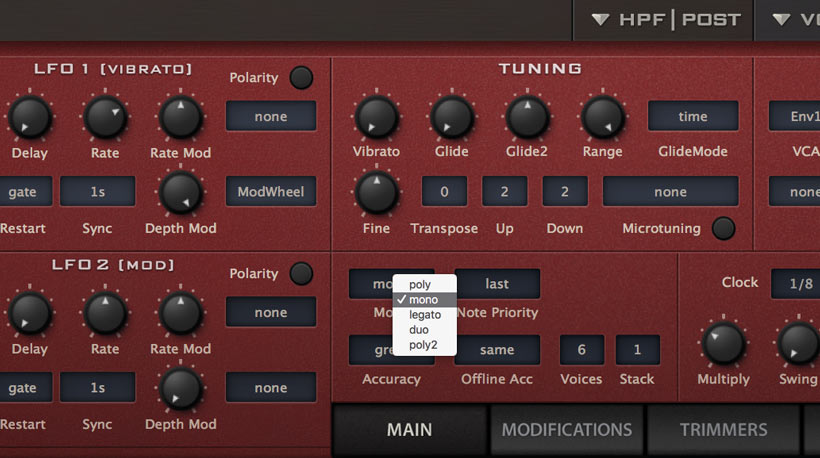
Step 1: Switching the Voice Mode to Mono
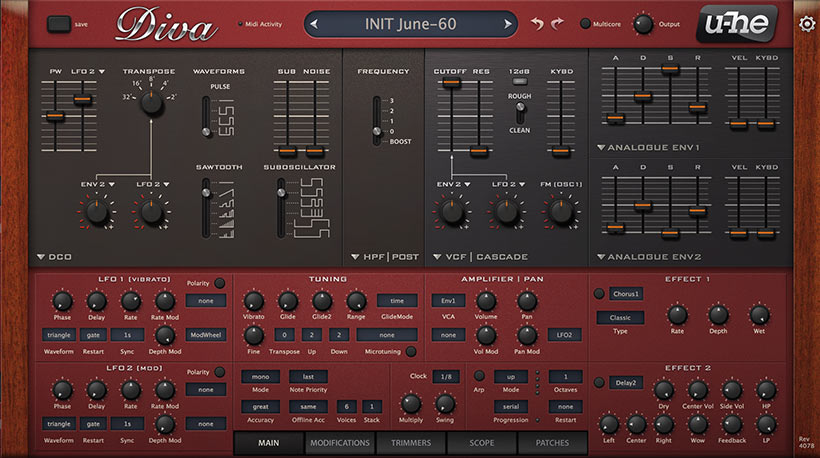
Step 1: The June-60 preset default settings
Sound at the end of step 1, the default June-60 settings:
Step 2
Click on Main to switch back to the synth controls. Turn off the Sawtooth Oscillator and make sure the Sub-oscillator Volume is turned down to zero. Move the Pulse Waveform toggle to the second option from the top. Now we have a slightly more simple and “bouncy’ sound to work with.
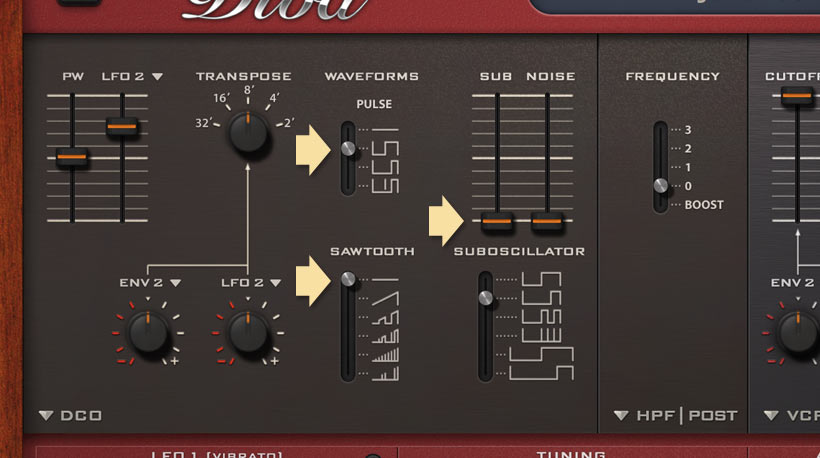
Step 2: Setting up the oscillators
Sound at the end of step 2
Step 3
Next, we set up an envelope to modulate the filter cutoff frequency. First, turn the filter frequency all the way down. Choose Env2 from the Filter Frequency modulation control. Turn the Frequency Modulation Depth knob all the way to the right (value: 120). In the Envelope2 panel, turn Velocity and Keyboard sliders to about 3/4 of the way up (value: 70). By doing this you add a bit variation and emphasis for individual notes depending on the MIDI note velocity and number.
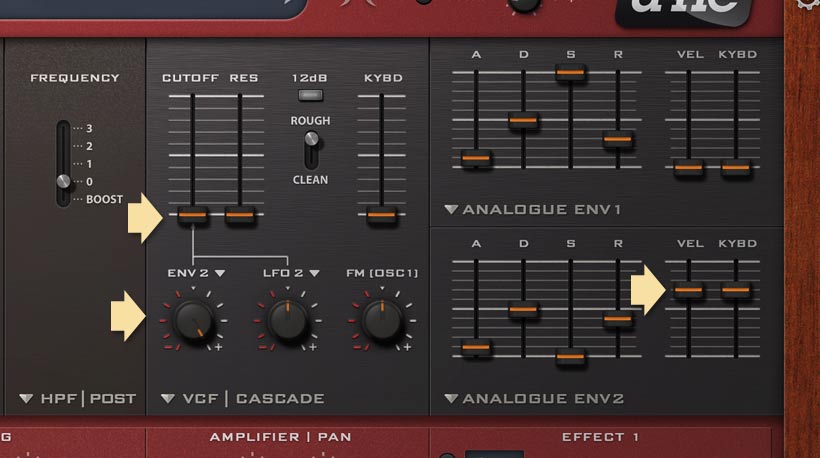
Step 3: Setting up filter modulation via filter envelope and velocity.
Lowering the Decay, Sustain and Release of Env2 will give the sound a more clipped feeling. We are setting the values at 36, 0, 33 respectively. Adjust to taste.
Also, you can reduce the Frequency Modulation Depth if you want a little less influence from the note velocity on the filter cutoff frequency.
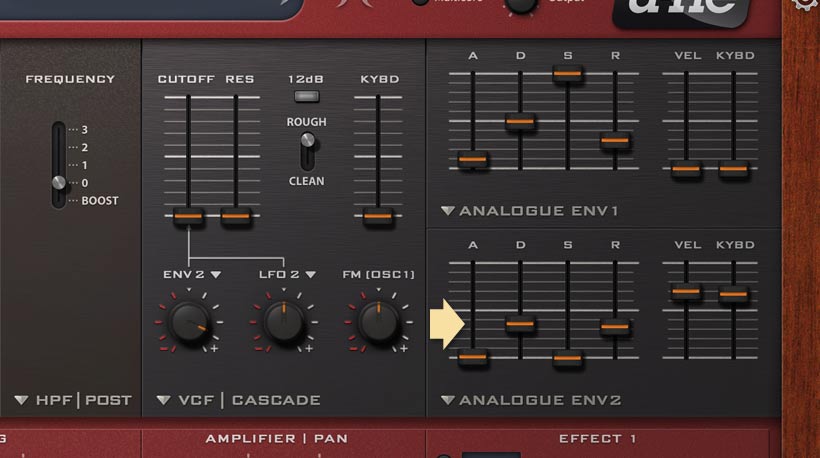
Step 3: Filter envelope adjustments
Sound at the end of step 3
Step 4
At this point we are close to the sound we are after, but a few last touches to warm it up and thicken it.
Turn on the Effect1 module, select Chorus and then the Classic setting. Turn Wet to about 90% and Depth to just under halfway. For a more intense effect try the Ensemble setting. Again, here is a place where your taste can guide you. Try the other chorus types or change the settings to find what works best for you.

Step 4: Effect1 settings
Sound at the end of step 4
That is it. You have created a straight-forward bass, which you can use in this finished form, or use it as a starting point for further experiments and refinements. Try adding effects in Effect2, different filter types, add modulation to the filter resonance, add the bass boost option in the central high pass filter for more low-end power. Diva offers a lot of options, so play around and see what you come up with.
The final result
The final sound in a full track
In this version we added a little EQ and compression to the bass. Plus, we applied sidechain compression using the kick drum.